
Plex
Plex is a self-hosted video streaming platform for managing your movie or TV show library and playing them locally or remotely. Plex has apps for TV, Android, iOS, Windows, and macOS, allowing you to stream your library just like Netflix.
With Plex Pass, you can also organize and play your music content similar to Spotify, the difference being that it’s your content, hosted and streamed from your server.
We'll also install Tautulli, a tool that provides detailed stats about Plex. As always, we'll use linuxserver.io images where possible.
Install Plex
- /
- srv
- docker
- plex
- compose.yaml
- .env
- config
- transcode
- tautulli
- config
- plex
- docker
- media
- tvseries
- movies
- library
- srv
Create the media folders
Create the movies, tvseries, and library folders in /media:
mkdir -p /media/movies /media/library /media/tvseries
Deploy the stack
Open Dockge in your browser and click compose.
Name the stack plex and add the following config:
---
services:
  linuxserver_plex:
    image: ghcr.io/linuxserver/plex:amd64-latest
    container_name: plex
    network_mode: host
    environment:
      - PUID=${PUID}
      - PGID=${PGID}
      - TZ=Europe/Paris
      - VERSION=docker
    volumes:
      - /srv/docker/plex/config:/config
      - /srv/docker/plex/transcode:/transcode
      - /media:/media
    restart: unless-stopped
    mem_limit: 4096m
    mem_reservation: 2048m
    devices:
      - /dev/dri:/dev/dri

  tautulli:
    image: lscr.io/linuxserver/tautulli:latest
    container_name: tautulli
    environment:
      - PUID=${PUID}
      - PGID=${PGID}
      - TZ=Europe/Paris
    volumes:
      - /srv/docker/tautulli/config:/config
    ports:
      - 8181:8181
    restart: unless-stopped
---
services:
  plex:
    #...
    labels:
      - com.centurylinklabs.watchtower.enable=true

  tautulli:
    #...
    labels:
      - com.centurylinklabs.watchtower.enable=true
Set your environment variables
Find your PUID and PGID by running:
id username
Fill in your .env file with the retrieved values, for example:
PUID=1000
PGID=1000
Deploy the stack.
The local interface is available at http://yourserverip:32400/web/index.html.
Tautulli is accessible at http://yourserverip:8181.
Done!
Configure Plex
Plex offers a range of free movies/shows. After creating your account, I recommend disabling everything in the Online Services section to keep your library clean.
Then go to the Remote Access section and manually select a port (we’ll use 1234). It's best not to use the default port.
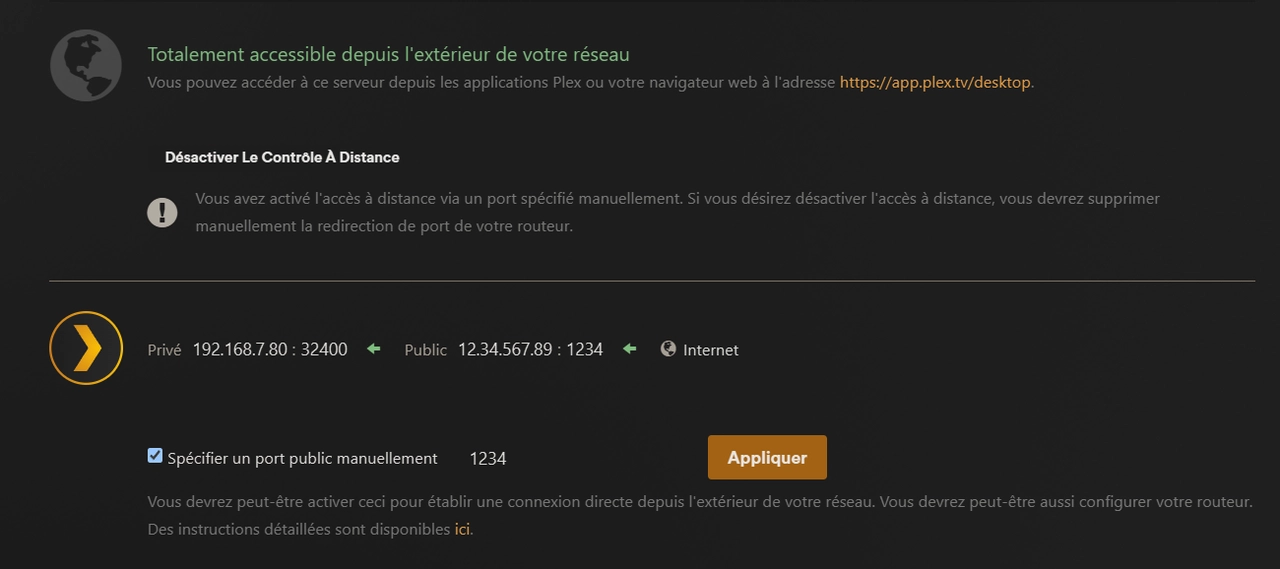
- On your router, forward TCP port
1234to port32400for your server’s IP using NAT rules. - Once done, return to Plex to verify that remote access is functional.
32400 on your server.- If you have PlexPass and a GPU or iGPU, enable hardware acceleration in the Transcoder section.
- In Settings > Library, enable Update my library automatically.
- In Manage > Library, add or edit libraries and point to
/media/moviesfor movies and/media/tvseriesfor series.
And that’s it! You now have a working Plex server!
Simply add your media to /media/movies and /media/tvseries on your server. You can then install the Plex app on your devices and watch your favorite content locally or remotely.
Expose Tautulli with SWAG
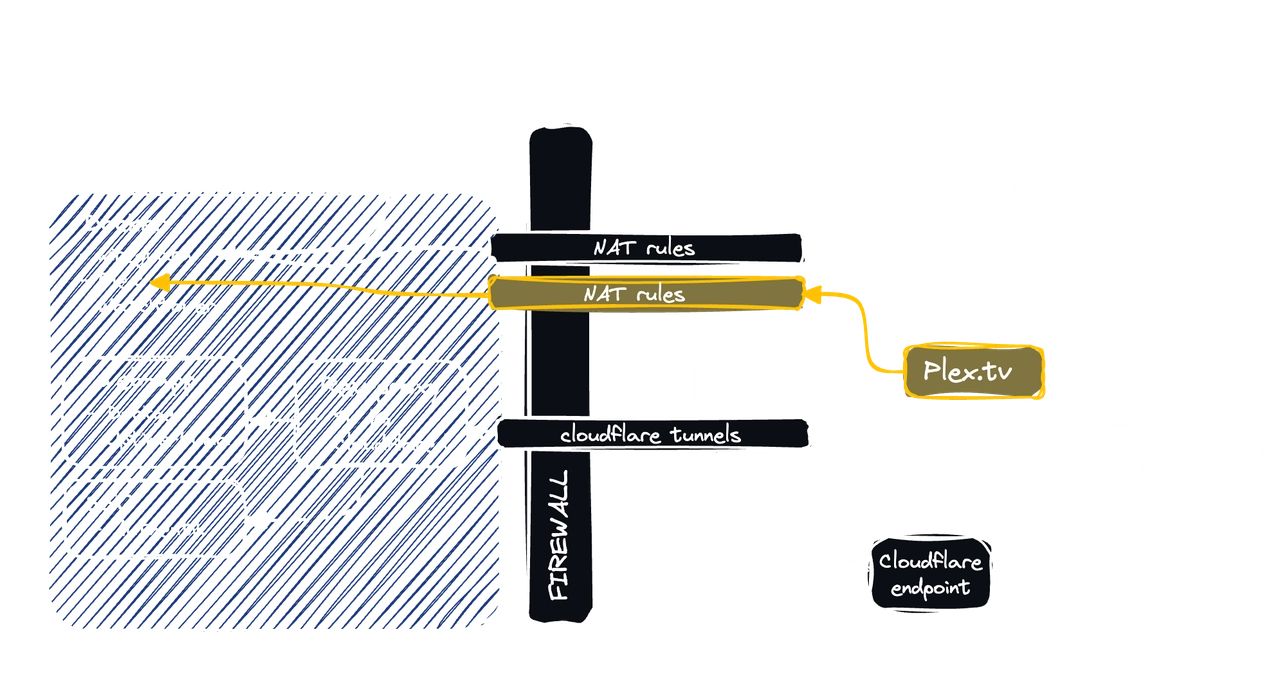
You don’t need to expose Plex, as it's accessible via your Plex account on plex.tv.
However, you may want to expose Tautulli so you can view stats from a simple URL when you're not home.
tautulli.mydomain.com with a CNAME pointing to mydomain.com in your DNS zone. And of course, unless you use Cloudflare Zero Trust, your box's port 443 must be forwarded to your server's port 443 in NAT rules.Add Tautulli's network to SWAG
Go to Dockge and edit SWAG’s compose file by adding Tautulli’s network:
---
services:
  swag:
    container_name: # ...
      # ...
    networks:              # Attach container to custom network
      # ...
      - tautulli            # Name of the declared network

networks:                   # Define the custom network
  # ...
  tautulli:                 # Declared network name
    name: tautulli_default  # Actual external network name
    external: true          # Marks it as externally defined
Redeploy the stack and wait for SWAG to be fully operational.
tautulli_default. You can check the connection by visiting SWAG’s dashboard at http://yourserverip:81.Create the subdomain.conf file
Copy and rename the file tautulli.subdomain.conf.sample to tautulli.subdomain.conf, then edit it:
sudo cp /srv/docker/swag/config/nginx/proxy-confs/tautulli.subdomain.conf.sample /srv/docker/swag/config/nginx/proxy-confs/tautulli.subdomain.conf
sudo nano /srv/docker/swag/config/nginx/proxy-confs/tautulli.subdomain.conf
Ensure the configuration matches the following, and edit it if needed:
## Version 2023/05/31
# make sure that your tautulli container is named tautulli
# make sure that your dns has a cname set for tautulli

server {
    listen 443 ssl;
    listen [::]:443 ssl;

    server_name tautulli.*;

    include /config/nginx/ssl.conf;

    client_max_body_size 0;

    # enable for ldap auth (requires ldap-location.conf in the location block)
    #include /config/nginx/ldap-server.conf;

    # enable for Authelia (requires authelia-location.conf in the location block)
    #include /config/nginx/authelia-server.conf;

    # enable for Authentik (requires authentik-location.conf in the location block)
    #include /config/nginx/authentik-server.conf;

    location / {
        # enable the next two lines for http auth
        #auth_basic "Restricted";
        #auth_basic_user_file /config/nginx/.htpasswd;

        # enable for ldap auth (requires ldap-server.conf in the server block)
        #include /config/nginx/ldap-location.conf;

        # enable for Authelia (requires authelia-server.conf in the server block)
        #include /config/nginx/authelia-location.conf;

        # enable for Authentik (requires authentik-server.conf in the server block)
        #include /config/nginx/authentik-location.conf;

        include /config/nginx/proxy.conf;
        include /config/nginx/resolver.conf;
        set $upstream_app tautulli;
        set $upstream_port 8181;
        set $upstream_proto http;
        proxy_pass $upstream_proto://$upstream_app:$upstream_port;

    }

    location ~ (/tautulli)?/api {
        include /config/nginx/proxy.conf;
        include /config/nginx/resolver.conf;
        set $upstream_app tautulli;
        set $upstream_port 8181;
        set $upstream_proto http;
        proxy_pass $upstream_proto://$upstream_app:$upstream_port;

    }

    location ~ (/tautulli)?/newsletter {
        include /config/nginx/proxy.conf;
        include /config/nginx/resolver.conf;
        set $upstream_app tautulli;
        set $upstream_port 8181;
        set $upstream_proto http;
        proxy_pass $upstream_proto://$upstream_app:$upstream_port;

    }

    location ~ (/tautulli)?/image {
        include /config/nginx/proxy.conf;
        include /config/nginx/resolver.conf;
        set $upstream_app tautulli;
        set $upstream_port 8181;
        set $upstream_proto http;
        proxy_pass $upstream_proto://$upstream_app:$upstream_port;

    }
}
# before include /config/nginx/authentik-server.conf; and include /config/nginx/authentik-location.conf;. Don’t forget to create an application and provider in Authentik.Press Ctrl+O, then Enter to save, and Ctrl+X to exit.
Done!
Wait a few minutes, then open http://tautulli.mydomain.com in your browser.
And you're done!